How to configure Outlook 2013 using IMAP
Synopsis
How to configure Outlook 2013 using IMAP.
* Support for Outlook 2013 ended on April 11, 2023.
Prerequisite
You must have Outlook 2013
You must have a SherWeb hosted Exchange acccount
How to
1) On your Desktop, go to Start Control Panel.

2) Click on User Accounts and Family Safety.

3) Click on Mail.

4) Click on Add.

5) Enter a profile name and click on OK.

6) Click the Manual setup or additional server types radio button and then click on Next.

7) Under Choose Service, select POP or IMAP and then click on Next.

8) Enter your name in the Your Name field and your email address in the E-mail Address field. Then enter the webmail value you can find in your Control Panel in the User Information section (ex: webmail.example.com) in the Incoming mail server field and enter the SMTP value you can find in your Control Panel in the User Information section (ex: SMTP.example.com) in the Outgoing mail server (SMTP) field. Finally, enter your email address in the User Name field and your mailbox password in the Password field. Make sure the Remember password box is checked. Pull the Mail to keep offline slider bar to All and click on More settings.

9) In the Internet E-mail Settings window, click on the Outgoing Server tab and check the box My outgoing server (SMTP) requires authentication.

10) Click on the Advanced tab.
Enter 993 in the Incoming Server (IMAP) field and select SSL for the type of encrypted connection.
Enter 587 in the Outgoing Server and select TLS for the type of encrypted connection.
Select the behaviour of your Deleted Items and Sent Items folders and click on OK.

11) Click on Next.

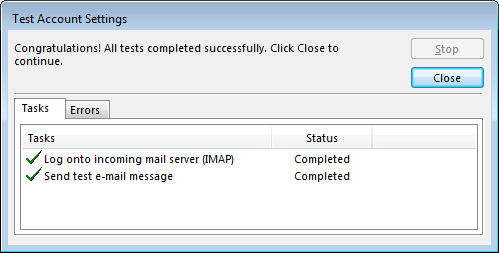
12) When the test is conclusive, click on Close.
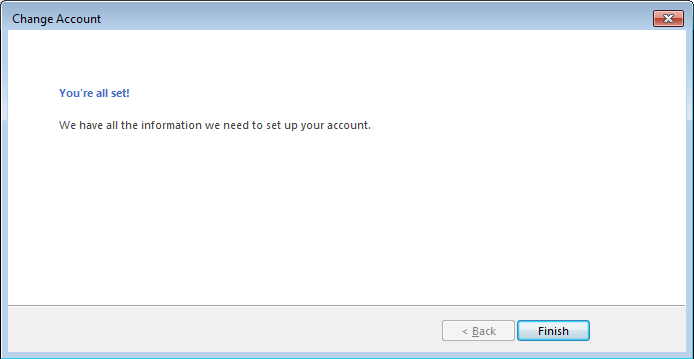
13) Click on Finish.
Feel free to contact us for any other questions.
Applicable to
All SherWeb hosted Exchange accounts