

FIM (Federated Identity Management)
Synopsis
This guide explains how to set up FIM in the Portal
Prerequisite
FIM (Federated Identity Management) integrates with Active Directory to provide identity synchronization, certificate management, user password resets and user provisioning from a single interface.
Note: If you choose to also use MFA in the Portal, note that it MUST be enabled, at minimum, in Azure AD. If MFA is enabled in the Portal, users will not be able to log in.
Applicable to
All Portal accounts
How to
Setting up the Identity Provider
Step 1
To set up Azure AD as the identity provider for the Portal, first log in to the Portal. Once logged in, click
- Security on the left menu
- Then Identity providers
Step 2
To use Microsoft Azure AD
- Enter the Azure AD domain
- Click Set up
Step 3
Validating the user
Portal usernames can be anything. Identity providers, however, usually use an email to identify and authenticate users. This is why we offer the option to map another username to a Portal username.
- This username will be used only when the identity provider is enabled.
- To simplify things for users, by default, we push the user email as Azure AD Username.
Step 4
Testing connection to Azure AD
- Click, Test connection to my Azure AD in order to enable Azure.
Step 5
When you log in to Azure AD, you will need to grant access to the Sherweb Portal.
- Click Yes
Step 6
Logging in with an identity provider
Once Azure AD is enabled as an identity provider, you must log in with your Azure AD username.
- Enter your username and click Next
- You will be redirected to a Microsoft login page
- Enter your password
Note: If you are already logged in to Microsoft, you will be automatically redirected to and seamlessly logged in to the Portal
What if the user is protected by MFA?
If your Sherweb (Portal) MFA is enabled and FIM is also enabled, MFA must be enabled as well in Azure AD. Otherwise, you will be unable to log in.
No double MFA
MFA is ALWAYS handled by the Identity Provider enabled on the tenant.
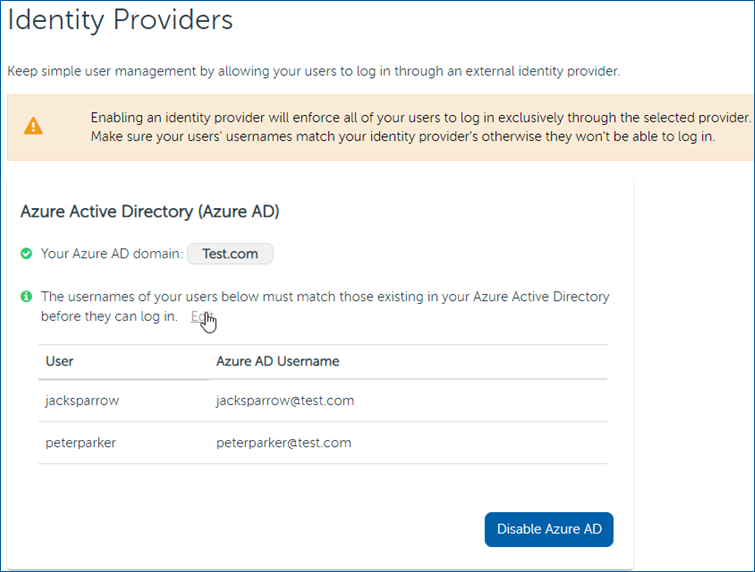
Update or add Azure AD username
- In the left menu, click Security, then Identity provider
- Click the Edit link above the user list
- You can now edit Azure AD usernames
 Managing users
Creating a new user
The process remains unchanged, with the exception that the user does not need to click on a link to complete their registration:
- Go to menu left, click Security, then Users
By default, the email entered will be the username (vs without FIM, where the user would need to go through the full process using the link in the welcome email to set their username and password).
Deleting a user
- In the left menu, click Security, then Users
- Select the trash icon next to the user you want to delete. The deleted user will be removed from the list.
To disable an identity provider
- In the left menu, click Security, then Identity provider
- Click Disable Azure AD. A confirmation message will be displayed to confirm that you wish to disable Azure AD as an identity provider.
What happens to my users?
Users that already had a password:
- Continue working using old username and password?
Users created after FIM has been deactivated:
- An email containing a link to create their account and password is sent.
Important note regarding Performance Cloud
When FIM is enabled, SSO for Performance Cloud no longer works.
When clicking on the Performance Cloud chip:
- A login page is displayed where a Portal username and Password must be entered - not their Azure AD credentials.
When creating a FIM user in the Portal
An Admin must invite the user from Performance Cloud admin section in:
- My Account > Administrator > Add
- The new user will be invited to create a password in order to access Performance Cloud.
Applicable to
All Portal accounts